To avoid an unpleasing background, find a different angle for your shot. Get down low to use the sky as a background (example lower left). Some of my favorite shots were taken while I was laying flat on the ground or floor. Getting above your subject allows the lawn or even your floor (example lower right) to function as your background. At your own risk of course, get up on a counter, step ladder, chair o r other stable object to get the angle you want.


Keep in mind that the background needs to have a complementing and pleasing color scheme. Clashing colors are clashing colors - avoid clashing colors. Find a different location. Your subject may need to select different clothing. This rule applies regardless of the background being in or out of focus. As what the example below.

Unless you are looking for a special effect, you need to be aware of the relative brightness of the background. See picture below.

There are exceptions to this rule, but having background objects that are brighter than the subject will often be distracting. Your eye will typically be attracted to the brightest part of the picture.
If you can't find the right existing background, add your own. Many backdrops/backgrounds are commercially available. A simple and inexpensive backdrop is a very large sheet of white muslin fabric. This makes a very pleasing background for portraits. For a lower budget approach, employ a white or black sheet. Be creative! Post processing techniques for removing, modifying or replacing the background abound. One amazing tool for accomplishing this task is Adobe Photoshop.
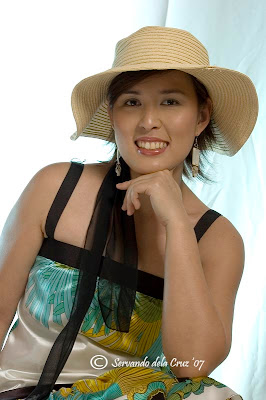
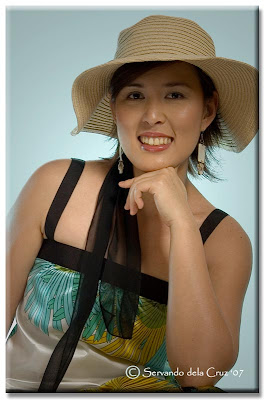
Before Photoshop After Photoshop
One such Photoshop technique is selective coloring. If you have a photo with a cluttered or distracting background, it may be a candidate for selective coloring. Selective coloring starts with the creation of a duplicate image layer in Photoshop. The second layer is converted to black and white or any color (see example above) and turned into a layer mask. The layer mask is carefully painted to allow or disallow the color layer to show through. The result is a full background and a subject in full color.

2 comments:
mahilig ka din pala sa photography...
good tips...pag-aralan ko yan,,,
thanks for sharing, your tips are very helpful!
Post a Comment